 ultimate-guide
How to Find High Quality Audio: A Complete Guide
Table of Contents
- What You'll Need Before You Start
- Step 1: Understand What Makes Audio High Quality
- Step 2: Choose the Right Lossless Audio File Formats
- Step 3: Pick Hi-Res Audio Streaming Services That Deliver
- Step 4: Learn How to Check Audio Bit Depth and Sample Rate
- Step 5: Match Your Hardware to Your Audio Quality
- Step 6: Set Up Your Listening Environment
- Step 7: Test Your Setup with Blind A/B Testing
- Common Mistakes to Avoid When Finding High Quality Audio
- Conclusion
- Frequently Asked Questions
Last Updated: September 22, 2026
What You'll Need Before You Start
Finding high quality audio starts with knowing which gear and settings actually matter, and which ones are marketing noise. Here's the honest version of what you need before you go hunting for better sound.
You don't need to spend a fortune. You need four things:
- A source that doesn't throttle quality. Many streaming apps default to low-bitrate streams to save data, so check your settings before blaming your headphones.
- One pair of revealing headphones or speakers. Something neutral enough that compression artifacts become audible.
- Storage space. Lossless files run several times larger than MP3s, so budget accordingly.
- Patience for testing. Your ears improve with practice, and so does your ability to spot a bad transcode.
Step 1: Understand What Makes Audio High Quality
High quality audio is a recording and playback chain where the file preserves enough of the original studio master that you hear detail, dynamics, and space rather than artifacts. Three technical variables decide most of that: bitrate, bit depth, and sample rate.
Bitrate, Bit Depth, and Sample Rate Explained
Bitrate is how much data flows per second, measured in kilobits per second (kbps). Higher bitrate means more of the original signal survives compression. Bit depth sets how many volume steps a recording can capture, and sample rate sets how many times per second the waveform is measured, in kilohertz (kHz). Standard CD quality sits at 16-bit/44.1 kHz; high-resolution files go beyond that with 24-bit depth and sample rates of 96 kHz or higher.
Lossy vs. Lossless: The Core Difference
Lossy formats like MP3 and AAC throw away audio data permanently to shrink files. Lossless formats keep everything, so the file can be reconstructed bit-perfect against the original master. That difference is the whole ballgame when you're learning how to find high quality audio, because no amount of expensive hardware can restore detail that was deleted at the encoding stage.
Step 2: Choose the Right Lossless Audio File Formats
Lossless audio file formats preserve the complete recording, but they differ in compression, compatibility, and file size. Pick based on where you'll play the files, not on which format sounds most impressive on a spec sheet.
FLAC, ALAC, WAV, AIFF, and DSD Compared
| Format | Type | Typical Use | Compatibility |
|---|---|---|---|
| FLAC | Lossless, compressed | Archiving, Android, desktop | Very broad |
| ALAC | Lossless, compressed | Apple devices, iTunes | Apple ecosystem |
| WAV | Uncompressed | Studio editing, mastering | Universal but bulky |
| AIFF | Uncompressed | Mac-based studio work | Apple-leaning |
| DSD | 1-bit high-res | Audiophile playback | Limited hardware support |
FLAC is the practical default for most listeners. WAV and AIFF carry identical audio to FLAC but take up far more space and carry weaker metadata support, which matters more than people expect once a library grows past a few hundred files.
Step 3: Pick Hi-Res Audio Streaming Services That Deliver
Hi-res audio streaming services only help if the tier you're paying for actually streams lossless files to your device. Many platforms advertise "high quality" while defaulting to compressed streams on mobile data, so verify the setting rather than the marketing copy.
Check three things before subscribing: whether the service publishes its streaming bitrate and format, whether lossless playback works on your specific device, and whether the app lets you download lossless files for offline listening. The Federal Trade Commission's guidance on advertising claims is a useful reminder that "high quality" is a vague term, and specifics are what count.
Step 4: Learn How to Check Audio Bit Depth and Sample Rate
Checking audio bit depth and sample rate takes about a minute once you know where to look. On desktop, right-click a file and open its properties or use a free tool like MediaInfo or Spek. On mobile, most player apps display the active stream's format in a playback info screen.
Look for two numbers: the bit depth (16-bit or 24-bit) and the sample rate (44.1 kHz, 48 kHz, 96 kHz, and so on). If a track claims to be high-resolution but reports 16-bit/44.1 kHz, you're getting CD quality, which is fine but not hi-res. If it reports 128 kbps, you're listening to a lossy stream regardless of what the app's badge says.
Step 5: Match Your Hardware to Your Audio Quality
Hardware sets the ceiling on what you can hear. A lossless file played through budget earbuds on a phone's built-in output will still sound thin, because the digital-to-analog converter and amplifier in that signal chain weren't built for detail.
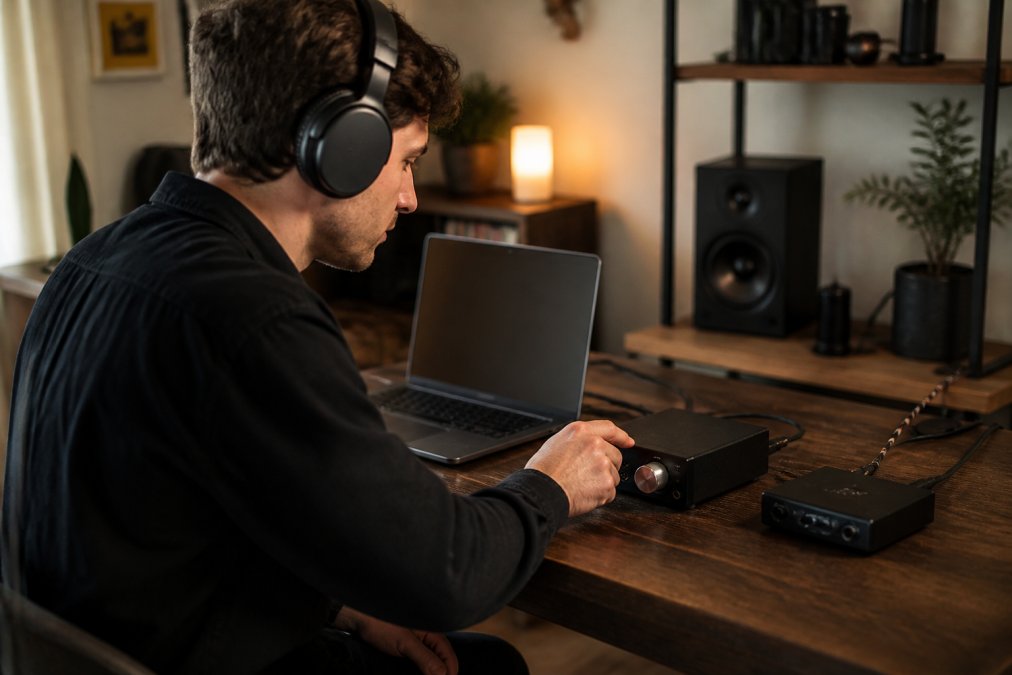
The signal chain runs in one direction: source file → DAC → amplifier → transducer (headphones or speakers) → room. Every stage adds its own noise floor and distortion. The weakest stage caps the whole chain, which is why a $200 pair of headphones on a clean $100 DAC can outperform $800 headphones plugged straight into a noisy laptop jack.
Headphone Specifications That Actually Matter
Three numbers tell you more than marketing copy:
- Impedance (ohms). Low-impedance headphones (under 50 ohms) are easy to drive from phones and laptops. High-impedance models (250-600 ohms) need a dedicated amplifier to reach usable volume without distortion.
- Sensitivity (dB/mW or dB/V). Higher sensitivity means the headphone converts power into sound more efficiently. A 100 dB/mW headphone needs far less amplification than an 85 dB/mW model at the same impedance.
- Frequency response. Look for a curve that stays relatively flat from roughly 40 Hz to 15 kHz. Heavy bass boosts mask detail in the midrange where vocals and instruments live.
A common pattern is buying high-impedance studio headphones without an amp, then blaming the headphones for sounding quiet and dull. Match the load to the source before spending more.
When You Actually Need a DAC or Amplifier
You need a dedicated DAC when your source device's built-in converter produces audible noise, hiss, or channel imbalance. You need a dedicated amplifier when your headphones don't reach comfortable listening volume at 70-80% of your device's output, or when they sound strained and compressed at higher volumes.
For most listeners on modern phones and laptops, the built-in DAC is adequate. The upgrade that matters most is almost always the transducer, not the converter. A modest DAC paired with genuinely revealing headphones beats an expensive DAC paired with muddy ones every time.
Speakers: The Power and Placement Trade-Off
Passive speakers require an amplifier rated to handle their impedance and power demands. Mismatched amp and speaker impedance can cause distortion, overheating, or rolled-off bass. Powered monitors sidestep this by building the amplifier into the cabinet, which is why they're common in small rooms and desktop setups.
Step 6: Set Up Your Listening Environment
Your room shapes sound as much as your gear does. Hard surfaces reflect mid and high frequencies, which smears soundstage and imaging, making it harder to tell whether a recording is genuinely detailed or just bright.
The core problem is the first reflection: sound leaving the speaker hits a wall, floor, or ceiling and arrives at your ears milliseconds after the direct sound. That delay causes comb filtering, which cancels certain frequencies and boosts others, creating peaks and dips in what you actually hear. The fix is either absorption (soft material that soaks up energy) or diffusion (irregular surfaces that scatter reflections in many directions).
Speaker Placement: The Free Upgrade
Before buying acoustic panels, try free placement changes:
- Pull speakers away from walls. A speaker within a few inches of a rear wall gets a bass boost that muddies low frequencies. Moving it 12-24 inches out reduces that buildup.
- Form an equilateral triangle. Your head and the two speakers should sit at the corners of a triangle with equal sides. This stabilizes the stereo image.
- Angle tweeters toward your ears. Tweeters are directional; pointing them at your listening position preserves high-frequency detail.
- Keep speakers off the same surface as your turntable or desk. Vibrations travel through shared surfaces and color the sound.
Treating the Room Without Buying Panels
Soft furnishings do real work. A thick rug reduces floor reflections. Heavy curtains on windows absorb high frequencies. Bookshelves act as crude diffusers. A sofa or bed behind the listening position absorbs rear-wall reflections. These won't match purpose-built acoustic panels, but they measurably reduce the smearing that makes detail hard to hear.
For headphone listening, environment matters less, but background noise still forces you to raise volume, which flattens your perception of dynamics. Quiet rooms make good recordings sound better. If you can't quiet the room, closed-back headphones with good isolation beat open-back models in noisy spaces.
Volume and Processing
Listen at moderate volume. Human hearing is not linear: at low volumes, bass and treble seem quieter relative to mids (the Fletcher-Munson effect), and at high volumes, perceived dynamic range compresses. Around 70-75 dB SPL at your listening position is a reasonable target for critical listening.
Close unnecessary apps so your device isn't fighting for processing power during playback. On computers, disable system-wide audio enhancements, spatial audio processing, and equalizer presets when evaluating source quality. These features alter the signal and can mask or mimic the differences you're trying to hear.
Step 7: Test Your Setup with Blind A/B Testing
Blind A/B testing is the only honest way to know whether a "quality upgrade" actually changed anything. Have someone else switch between two files or settings without telling you which is which, then log your guess each round.
Run at least ten trials per comparison. If you can't beat chance, you're hearing the placebo effect, not a real difference. That's not a failure; it's useful data. Plenty of listeners can't reliably distinguish 320 kbps from lossless on casual gear, and knowing that saves real money.
The Audio Engineering Society's published research has documented how expectation shapes perception in listening tests, which is exactly why blind methodology matters. Run the test on desktop first, where switching is easiest, then repeat it on your phone, because mobile playback often applies its own processing that quietly undoes your settings.
Common Mistakes to Avoid When Finding High Quality Audio
The most common mistake is chasing specs instead of solving the actual bottleneck. A 24-bit/192 kHz file played through a noisy laptop output sounds worse than a well-mastered 16-bit file through a proper DAC.
Other traps worth avoiding:
- Trusting the badge over the file. Apps label streams "HD" or "Ultra" without disclosing the real bitrate. Verify it yourself.
- Transcoding between lossy formats. Each conversion strips more data. Go back to the source.
- Ignoring metadata. A library without consistent artist, album, and track tags becomes unusable fast, so fix tags as you import rather than later.
- Buying hardware before fixing your source. Better headphones reveal problems, they don't fix them.
Conclusion
Getting genuinely better sound comes down to removing weak links, not adding expensive ones. Fix your source files, verify your streaming settings, match your hardware to the job, and test your changes blind before you trust them.
That same principle guides everything we do at hush. We built a library of independent audio fiction around a curated, ad-free listening experience with a mood-based catalog, weekly editorial refreshes, and a revenue model that pays 70% of subscription fees directly to the writers and voice actors behind each story. You can cancel anytime.
If you care about how audio actually sounds, start listening with hush.
Frequently Asked Questions
Where can I find high quality audio?
You can find high quality audio through dedicated hi-res streaming services, lossless download stores, and physical media like CDs or vinyl. Streaming platforms that offer FLAC or ALAC tiers give you CD-quality or better without needing to store files locally. For downloads, look for stores that sell studio master files in formats like FLAC or WAV. Always check the bitrate and format before you commit, since some services label tracks as 'high quality' without specifying the actual specs.
Is 320kbps the highest quality audio?
No. 320kbps is the ceiling for MP3, which is a lossy format. Lossless formats like FLAC and ALAC typically deliver around 1,411kbps for CD quality, and hi-res files can go much higher. The difference is audible on revealing headphones and a decent digital-to-analog converter. If you want the best fidelity, move past 320kbps and look for lossless or uncompressed files instead.
What is the difference between lossless and lossy audio?
Lossy audio (like MP3 or AAC) permanently removes some sound data to shrink file size. Lossless audio (like FLAC or ALAC) compresses files without discarding any information, so playback matches the original recording. Lossy is fine for casual listening on earbuds, but lossless preserves dynamic range, soundstage, and detail that matter on a good system. The trade-off is larger file sizes and higher streaming bandwidth.
Do I need special equipment to hear high quality audio?
You need at least one weak link removed from your signal chain. A dedicated digital-to-analog converter and a pair of revealing headphones or studio monitors make the biggest difference. Built-in laptop or phone outputs often add jitter and harmonic distortion that mask the benefits of lossless files. You do not need to spend thousands, but a basic DAC and decent headphones will let you hear what high quality audio actually sounds like.